Showing posts with label "Flower Garden". Show all posts

May 23, 2011

Fabulous Florets - Gem of a Friend PP48 sketch challenge

Today's post is for The Paper Player's sketch challenge. My wonderful up line Nance Leedy of Canopy Crafts was the Paper Players DT member that chose this great sketch..
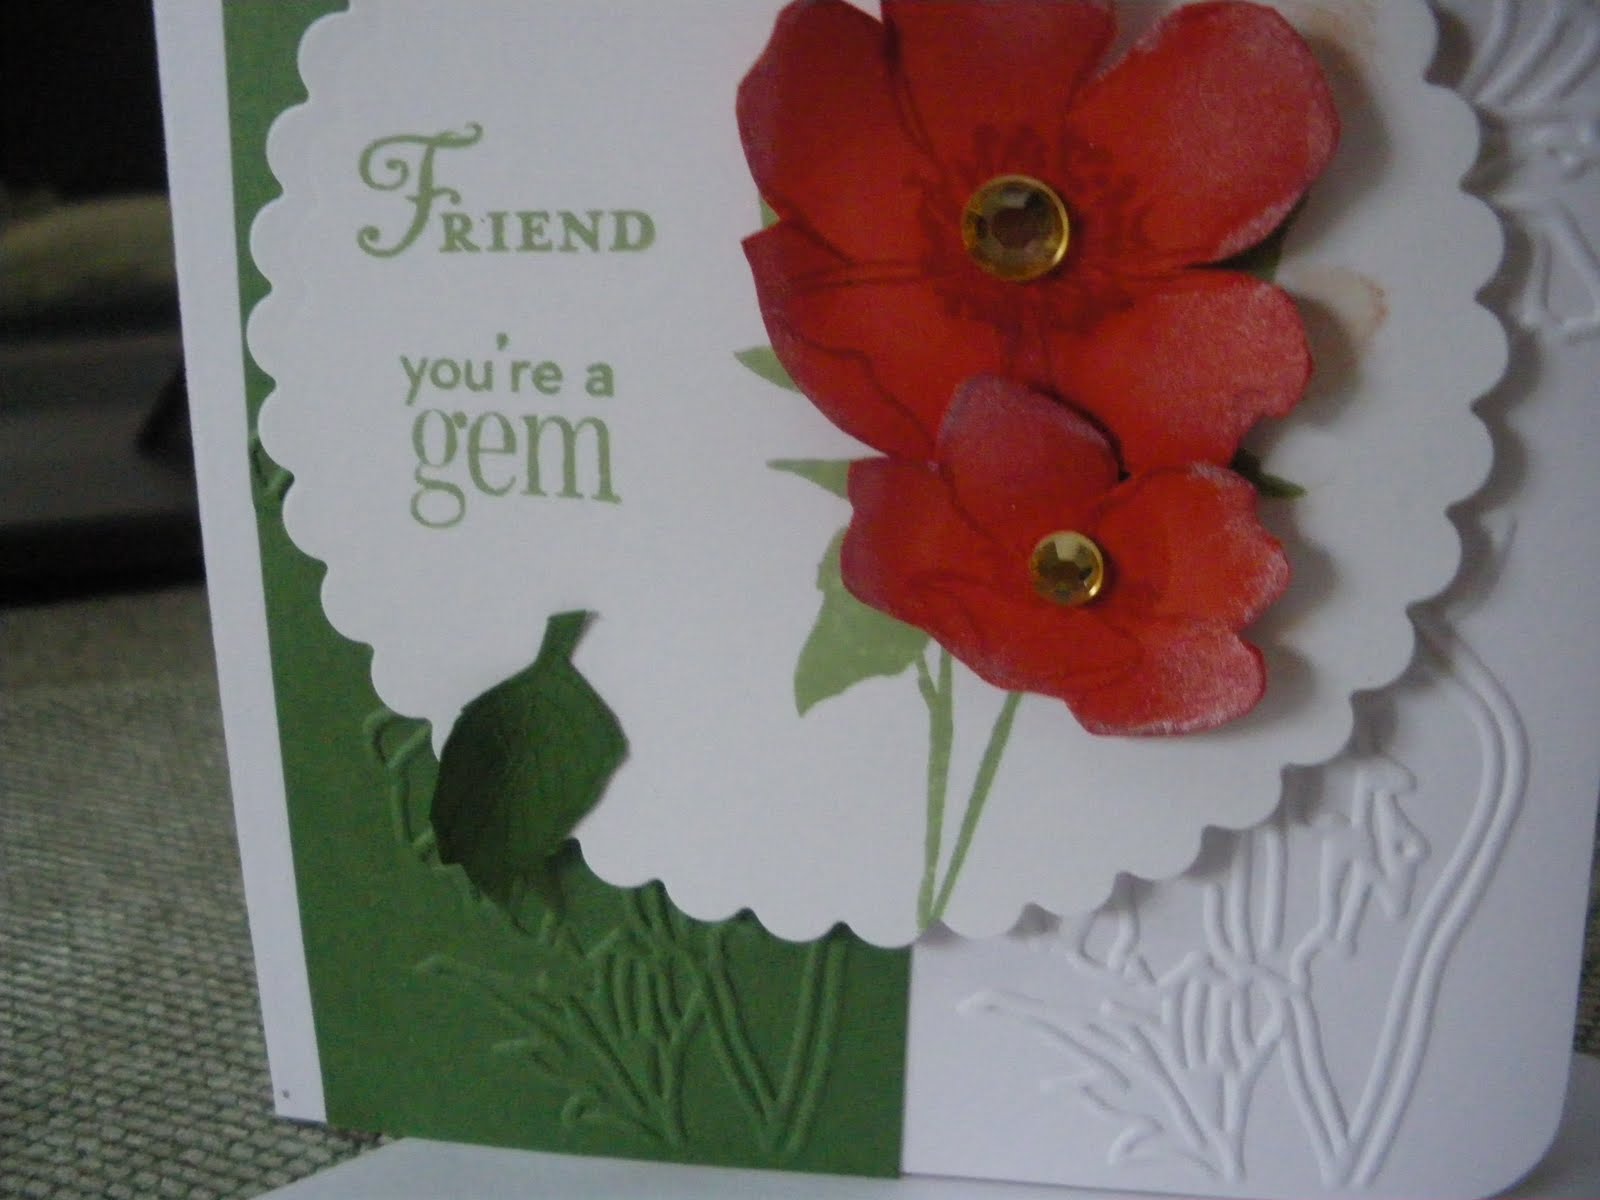
and here is my card for the challenge using my favorite set from the summer mini Fabulous Florets, and another new item; the Flower Garden embossing folder.
I hope you can see the sketch, which I modified a bit, but I think I captured it okay.
I started with a white card base embossed with the Flower Garden emboss folder, then embossed another piece of wasabi green and placed it on the front left side.
Here is a closer look at the embossing side by side.
The focal point is a w.w. white scallop circle stamped with a sentiment from "You're a Gem" in wild wasabi ink. Then I stamped the stem from "Fabulous Florets" in wild wasabi, and stamped a second time (without reinking) on the inside. (you'll see that in a minute). Then I stamped the blossoms from the Fabulous Florets on tangerine with tangerine ink and cute them out. (I stamped a second time without re-inking on the inside again). I dusted the edges with a touch of white shimmer paint, then added a few rhinestones and popped them up with a dimensional.
 I stamped a few leaves in wasabi and cut them out and added to the focal point to complete my sketch items.
Here's a peek at the inside, but I haven't added the sentiment yet.
Then the finishing touch on the envelope.
Done!


Hootie says " Hoot Hoot Hooray...Thanks for stopping by today!
 Please leave a comment with your thoughts; I hope you will stop by again!"
 Diane

May 22, 2011

You're a Gem of a Friend

Today is a quick post of a card I made for a friend. I love the colors and actually made several; each a little different. Here is my card.
I started with pacific point blue and layered with daffodil delight accents.
I embossed the card front with the new "Flower Garden" embossing folder. Then I stamped one blossom from "Fabulous Florets" several times in pacific point on w.w. cs and ran it through the BS using the square lattice emboss folder. I added that to a pacific point mat, and again with a daffodil delight mat.
I wrapped this stack with a frayed piece of wide striped daffodil delight ribbon and tied it with the tiny piece I cut off the edge, then I added to the card front. I stamped the sentiment from "You're a Gem" set in pacific point on w.w. and double matted with a daffodil scallop oval, and a pacific point large oval then popped it up with a few dimensionals overlapping the ribbon. 
I stamped another blossom from "Fabulous Florets" and cut it out leaving a hint of white and popped this up as well, then added a pretty blue rhinestone to the center.
 Here is a peek at the inside using a sentiment from "Happy Greetings" and a few more blossoms from "Fabulous Florets".

Hootie says " Hoot Hoot Hooray...Thanks for stopping by today!
Please leave a comment with your thoughts; I hope you will stop by again!"
Diane

May 15, 2011

Here Comes the Bride - {PPA93} challenge

Hi there everyone... well today my post is for the Pals Paper Arts "Here Comes the Bride" challenge, and here is the inspiration photo.... oooohhh so pretty.
My wedding stamps are very limited, but here is my card. 
It really is much prettier in person than it's showing here, so use your imagination. I started with a crumb cake card base, than punch the corners with a double rounder. The next layer is a very vanilla stamped with an image from the "Blissful Bride" set. I colored the bow on the dress with a blushing bride write marker, then run through the BS with the square emboss folder and added a tiny pearl the center of the bow. 
 The next layer is vellum card stock embossed with the new "Flower Garden" emboss folder which I colored with a touch of crumb cake ink, then tore the edges before attaching.
Next I stamped the sentiment from "Happy Greetings" in crumb cake in on very vanilla cs and punched with the decorative label punch. I punched a second label from some gold tissue paper and beefed up the back with a third label in cs.
 I colored a small rosette with the blushing bride write marker and added another pearl to the center of the rosette.
Here's a peek at the inside using touches from the front.
Then I stamped the envelope.
Hope you liked my card today.

Hootie says " Hoot Hoot Hooray...Thanks for stopping by today! Please leave a comment with your thoughts; I hope you will stop by again!"
Diane

LinkWithin

Related Posts with Thumbnails