March 6, 2011

Sew Suite - {PPA 83} Color challenge

Hi again!
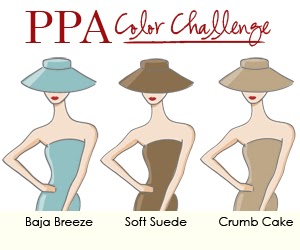
Can't even believe I'm posting again today, but thought I'd try another challenge since the weather stinks! So after playing around all day I decided to to post this card for the Pal Paper Arts color challenge #83, and here are the pretty colors.
I decided to use the my new stamp set Sew Suite  from the Occasions mini for this challenge and here is my card.
I have very little baja breeze anything so I hunted through my stash and found this Elegant Soiree' DSP to help me out.
I matted a piece of DSP on some crumb cake cs and glued to the card front.
Then I stamped the dress forms on a piece of whisper white and then stamped again on some DSP; cut out and glue to the forms.
 I first saw this inspiration from both Nance Leedy my up-line and Ann Schach, as well as a few more stampers out there in blog land, but this was not my original idea. 
  I stamped the buttons card from Sew Suite in crumb cake on W.W. and cut it out. Then die cut some buttons in heavier SDSP and threaded with linen thread then glue to the button card with glue dots.
I also scrunched some baja breeze seam binding and tucked it behind and over the two front elements that are popped up with a few dimensionals.

The inside sentiment is a stamp from "Puns from the Past" and fits perfectly with this theme. I also stamped the tape measure from "Sew Suite" on a scrap of baja breeze and cut it out. Then I scrunched it up as well and tucked behind the mat then glued down here and there with some tom bow glue.
I colored the end of the tape measure with a silver paint pen (I think this IS my idea because I've not seen it out there in blog-land) to make it look like a real tape measure.
This finishing touch was to line my envelope with more Elegant Soiree' DSP. Done!

Hootie says "thanks for stopping by and please leave a comment".

Spring has Sprung {PP37}

Happy Sunday everyone.

Today I'm posting for the Paper Players Theme challenge {PP37} "Spring has Sprung"!  I for one can't wait for spring to get here. We just got socked with another 3" of snow after seeing the grass last week... Enough already!

Well back to my card which is pretty easy to figure out. I wanted use up some of my old DSP scraps (retired) as well some new things from the Occasions Mini and the SAB sets.  Here is my 'spring' card.
The card base is Peach Parfait CS embossed with the 'Framed Tulips' EB. I matted a piece of Sweet Pea DSP (retired) onto bashful blue cs.
The DSP does all the work on this card, so I just touched up a few butterflies with some sparkles.

I took a piece of baja breeze Seam Binding and pulled the center string to gather it; then wrapped around the matted DSP before attaching matted DSP to the card front. 
The sentiment is inked in peach parfait on whisper white cs then punched with the circle scallop punch.  The sentiment is from one of the FREE SAB sets; "Punch Bunch".  This entire set fits current punches and it's so nice to know you don't have cut them out!  I then popped up this sentiment with a couple dimensionals to the lower right corner. 
The inside shows touches of the front, but I just inked the flower portion of the stamp separately with a marker and added below the inside sentiment.  

Hootie says "Thanks for stopping by and please leave a comment".  

March 3, 2011

MDS Practice!

Hi there everyone. 
  I'm very excited to say my good pal (Sharon) purchased the MDS software from me last week, so I thought I better get busy and practice with it! After all, I will have to help her ... and right now I know very little. So I thought to myself.... "Self.... you better practice, practice, practice!" So I did.

I'm doing a quick post of two MDS pages I made tonight... can you believe it? TWO WHOLE pages in very little time at all. I do feel like I'm progressing with the MDS software, but my oh my... SO MUCH to learn.

The pages need no explanation so I'll just post them for you to critque'... and please do tell me what you see if I goofed on something. I LOVE constructive criticism, so don't be shy!

The first post is a photo of my youngest grandson's 2nd Birthday. His big sisters, Hannah & Becca, are helping him blow out his candles. Such sweet big sisters. Here's my page. 

On this page I tried to use a torn edge and some stitching. I still can't figure out how to shorten those ??? I ended up covering up the edge to the left bottom corner with a punch, then filled it with background paper.

The second page is very self explanatory... and Brian's first Official time to do his duty! Here's my second page:

He's gonna have a few words for Gramma when he gets bigger. {smile}
but that's just fine with me!  Hope you like my pages.

Hootie says "Thanks for stopping by and please leave a comment and tell me what you think!" Any and all Tips are welcome too. Hugs.

March 1, 2011

Stylish Blogger Award Surprise

Imagine my surprise when I found in my comments I won this Stylish Blogger Award! 
This award was given to me to by Kelly Birrell at Scrap Happy!


Thank you SO MUCH Kelly for thinking of me. I am SO Excited to recieve this award for a second time! (Dec 2010). 
 Part of accepting this award is to:
1. Thank and link back to the person who gave you this award. Thanks Kelly!
2. Share 8 things about yourself
3. Pass it on to 8 bloggers
4. Contact those bloggers and tell them about their award


8 {more}Things about me:
1 - I work full time and stamp as a hobby, but wish it was the other way around.
2 - Originally my passion was scrapbooking, but I slowly became an obsessive Stamper and card maker. LOVE every minute of it too. 8-)
3 - I became a Stampin' Up demo going on two years in May 2009 and Still feel like a newbie when I see the talent out in blogland. Wowzer!
4 - I'm becoming a "Digital Scrapbooker".... so much faster.  
5 - As much as I 'USE' a computer.... I'm STILL pretty much a stumper as to HOW the inerds work, or how to do a lot of stuff .... just ask Nance, Sharon, Nancy, Sherriee.... what would I do without them? THANKS gal pals!
6 - Have one daughter and three 'perfect' Grandchildren: (2 girls and 1 boy) that live in another state.. thank goodness for SKYPE.  
7 - I love to GOLF! I love to Golf ..... I LOVE to Golf! Can't wait for spring to get here.
8 - I admire and am grateful for the many talented bloggers out there that give me inspiration and friendship and especially to the ones who stop and leave a comment from time to time.


As difficult as it is to only name 8, here are 8 more stamper that inspire me.  
Anne Marie at Stampin Anne
Pam at WackyWippet Stamper
Lesley at Always Playing with Paper
Kerin at Stamps, Paper Glitter
Lee Ann at Wee Inklings
Patti at Papercrafts by Patti
Dianna Ball at Stamping Moon
Buffy at Stamp with Me!


Now won't you stop by and check them out too?

February 27, 2011

Build-A-Blossom PPA82 & CD98

Happy Sunday everyone.
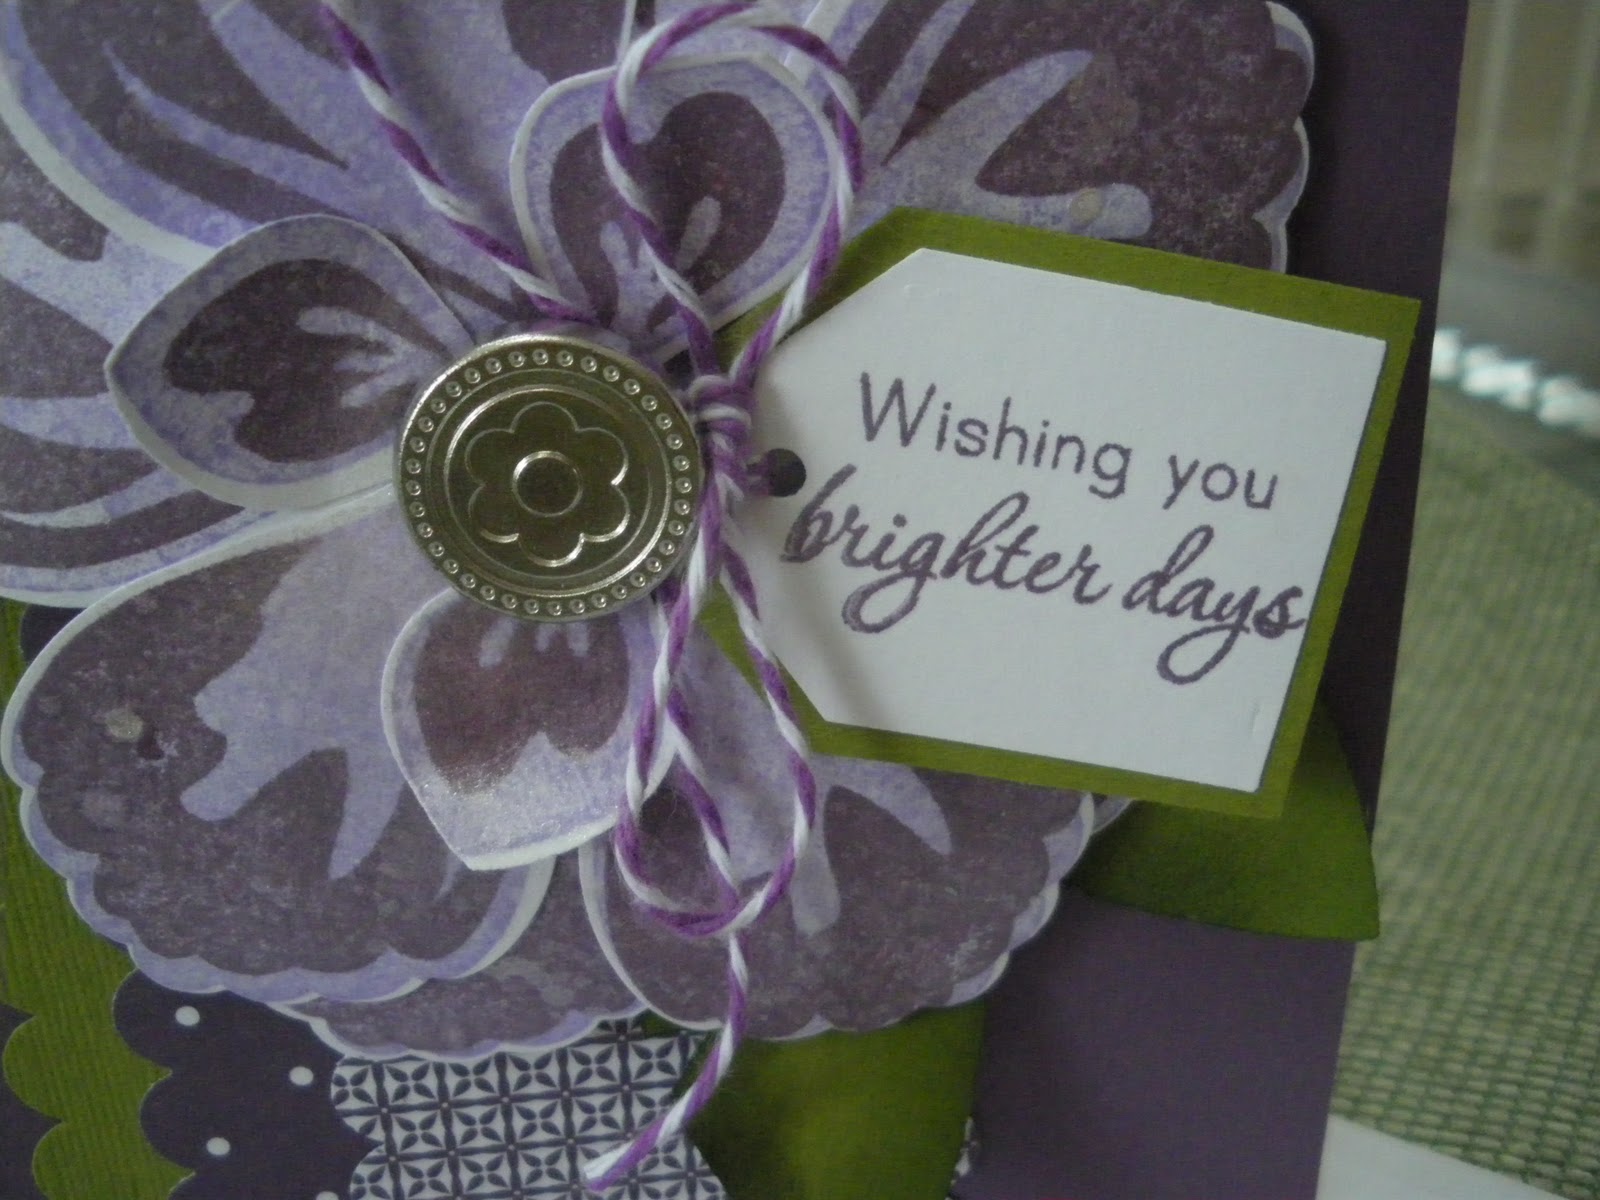
 Today I'm posting a card that will work for two challenges; The Pals Paper Arts   theme challenge #82 and also the  Color Dare Color Challenge #98.

For the PPA challenge - Scallops of any kind could be used, and for the CD challenge - the colors are Perfect Plum, Always Artichoke and any Neutral.
It's always fun when the card you make will work for two challenges, isn't it? So with that being said... here's my card I'm sending to a friend going through chemo treatment.
I started with a 'Perfect Plum' CS base then added three layers (Always Artichoke CS, & two layers of Perfect Plum DSP) all scalloped with the scallop edge punch then glued to the front.

Next came that pretty blossom created with the new "Build A Blossom" stamp set. I double stamped the large petals in a lighter shade of purple {retired} then accented each with perfect plum ink on strips of whisper white CS [stamping the petals on strips of cs reduces the waste]. I punched them out with the "Blossom Petals" punch then repeated the process with the small petals.
 I built the blossom by adding sticky strip to a 1 3/4" circle of perfect plum  cs. Then I used the mat stack to poke the hole in the center.  I placed four large flower petals down on the circle and pressed to the sticky strip, then repeated with four more,  and then layered the small petals with tom bow glue. I pushed a large flower brad through the center hole but did not spread the clasp yet.

Before adding to the front I cut 3 large leafs with the build a blossom die and shaded the edges with AA ink; then held the Blossom in my hand and eye-balled where they would lay and glued to the card front with tom bow.

Next I stamped a sentiment on w.w. and punched with the smaller tag punch, then matted with an A.A. cs larger tag. I tied it to the brad by looping some twine around the pin with a bow, then spread the clasp on the back of the circle.
I mounted the large blossom with sentiment to the card front dimensionals.
Here is a peek at the inside with elements of the front; scraps of the DSP, a small stamped petal and a few more scallops! 


For the finishing touch, I 'finally' remembered to lined my envelope!

Well there you have it,  hope you like it.

Hootie says "Thanks for stopping by and please leave a comment".

LinkWithin

Related Posts with Thumbnails